WoW Midnight Labyrinth of Kindo'jan Guide

The WoW Midnight Labyrinth was introduced in Patch 12.1.5 as a mega-delve consisting of nine chambers, at the end of which the Kindo'jan boss awaits players at Tier 8 and above. The first such delve was the Labyrinth of Kindo'jan, access to which is unlocked by a short quest chain. Inside, you choose a Tier based on your ilvl, map out a route, and search for the Labyrinth's secrets, while the number of chests at the end of the run increases with each chamber you clear. For a solo kill of Kindo'jan at Tier 11, the game rewards you with the Loa-Blessed Wayfarer mount. If you don't have enough time for a full run and the boss fight, our team will complete the Labyrinth and defeat Kindo'jan on your character as part of the WoW Labyrinth of Kindo'Jan Boost service.
What Is the WoW Midnight Labyrinth?
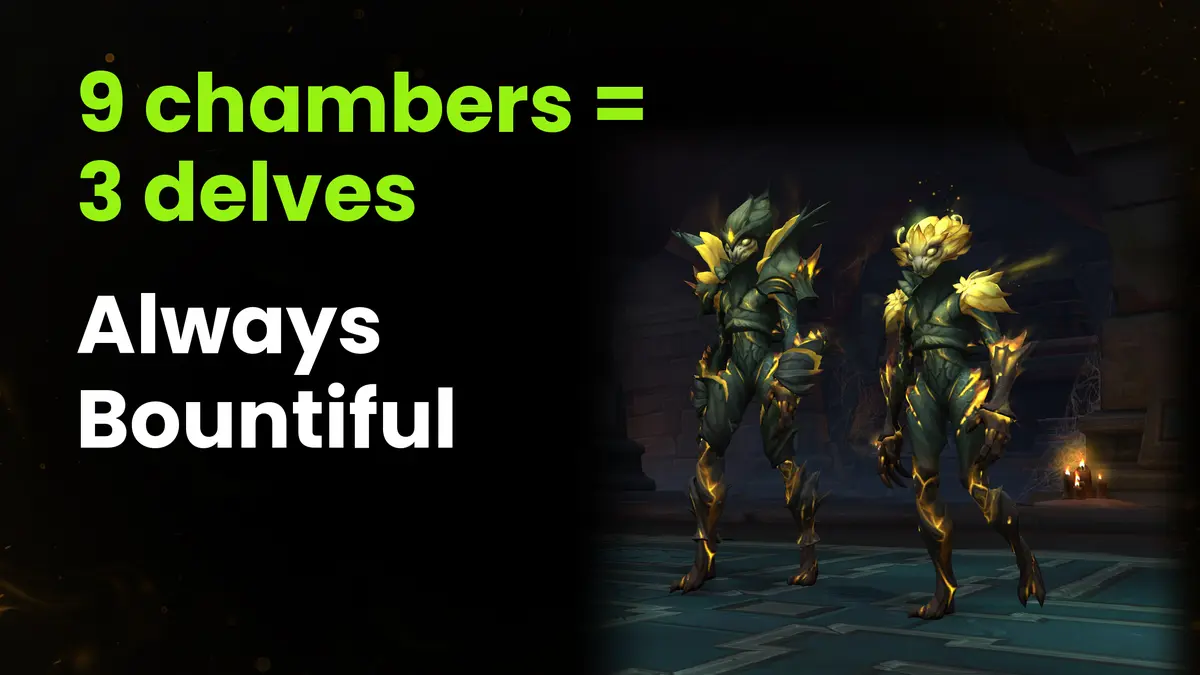
The Labyrinth is a new type of delve (mega-delve) that Blizzard added in Midnight Season 2 via Patch 12.1.5, released on October 13, 2026. Any delve is a short instance that you clear alongside your companion, Valeera Sanguinar. This format was introduced by the Labyrinth of Kindo'jan, featuring 11 difficulty tiers and nine chambers, each with its own objective and often its own mini-boss. Together, these chambers are equivalent to three standard delves in a single instance. A mega-delve is always Bountiful and has no story variations, so a Restored Coffer Key will come in handy on any run.
Unlike in a regular delve, you choose the route between the Labyrinth's chambers. A full run yields three times as many chests as a standard delve, since each completed chamber adds them at the end of the run. At Tier 8 and above, such a run also unlocks an optional fight against the nemesis Kindo'jan. A separate Journey track and the Labyrinth's secrets give cosmetics and permanent buffs that make each new run easier.
How a Labyrinth Run Works
Each run begins in the Chamber of Rites. One chamber remains active in the Labyrinth at a time, because the game unlocks the next one after the current task is completed. After that, the spirit of Kinduru offers a teleport to one of two new paths or to a treasure room with an exit from the Labyrinth. Entering a new chamber gives a revive in case the character dies, the opportunity to change Valeera's talents or repair, and a place to rest. Storylines, mini-bosses, and tasks change with each new run (ranging from filling a gauge and killing bosses to solving puzzles and searching for items), though some chambers are empty and complete on their own.
You can end your run with Kinduru in a cleared chamber, in the hall before Kindo'jan, or by using the Kinduru's Spiriting Quill toy. Kinduru teleports you to the treasure room with chests, the number of which depends on how many chambers you've cleared. I recommend ending your run at milestones where the game adds a Bountiful Coffer and a Great Vault credit (that is, after the third, sixth, or ninth chamber).
How to Unlock the Labyrinth
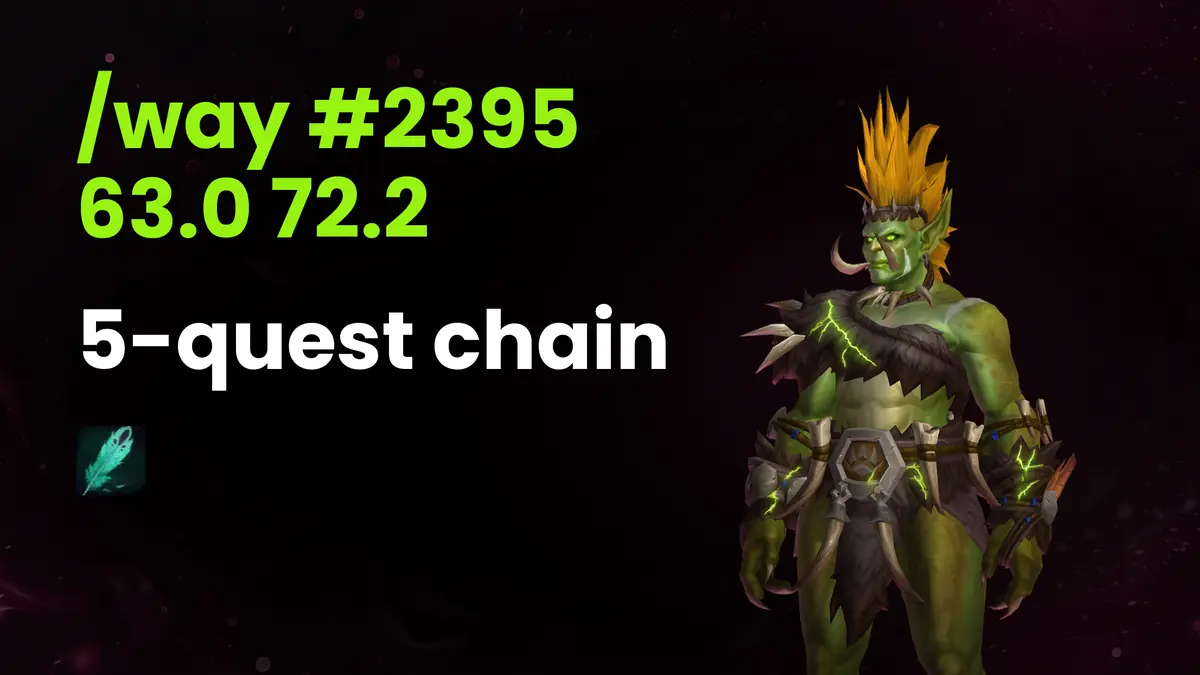
The Labyrinth unlocks after a short introductory quest chain, the first quest of which (The Labyrinth) is given by Kul'amara the Fierce in Tokka's Landing. You can also pick up this quest from the Adventure Guide or at the entrance to the mega-delve. After the quest chain (which takes you through the first three chambers with Valeera Sanguinar), the Labyrinth is unlocked for the entire Warband.
Labyrinth of Kindo'jan Location
The entrance to the mega-delve is located in the mountains north of Amani Pass, in the southeastern part of Eversong Woods near the border of Zul'Aman. To place a marker on the map, type /way #2395 63.0 72.2 in chat. The marker leads right to the entrance, where Valeera Sanguinar greets you in the first quest of the chain.
Starting at Journey rank 8, Telemancer Astrandis in Silvermoon City sells the Delve-O-Bot 7001: Midnight Software Update Chip. You will no longer need to travel through Eversong Woods on subsequent runs, as this chip adds the Labyrinth to the locations to which the Delve-O-Bot 7001 teleports you.
The Labyrinth Quest Chain
The five quests in the introductory chain are preceded by two quests you don't need to complete: On the Trail of Kindo'jan and The Labyrinth of Kindo'jan. The mandatory quests follow in order:
- In the quest The Labyrinth, Kul'amara the Fierce sends you to Valeera Sanguinar at the entrance.
- Dangers Untold and Hardships Unnumbered guides you through the Chamber of Rites until the Spirit Gate blocks your path.
- The spirit of Kinduru (the last speaker of Akil'zon) gives you You Remind Me of the Bird and helps open the path to The Reliquary. The quest rewards 500 Undercoin.
- After clearing The Reliquary and Halazzi's Lair with the boss Sha'Kuro, you speak with Kinduru and turn in The Way Forward... for 500 Undercoin and a Restored Coffer Key.
- In ...Is Sometimes the Way Back, Valeera sends you to Kul'amara for a reward of 500 Undercoin and the Kinduru's Spiriting Quill toy.
Since this toy ends every run and teleports you to the chests, I wouldn't use it until after the fight with Kindo'jan. Kinduru's spirit itself continues to accompany you on every run and leads you out of the Labyrinth when you decide to end it.
Labyrinth Tiers and Item Levels
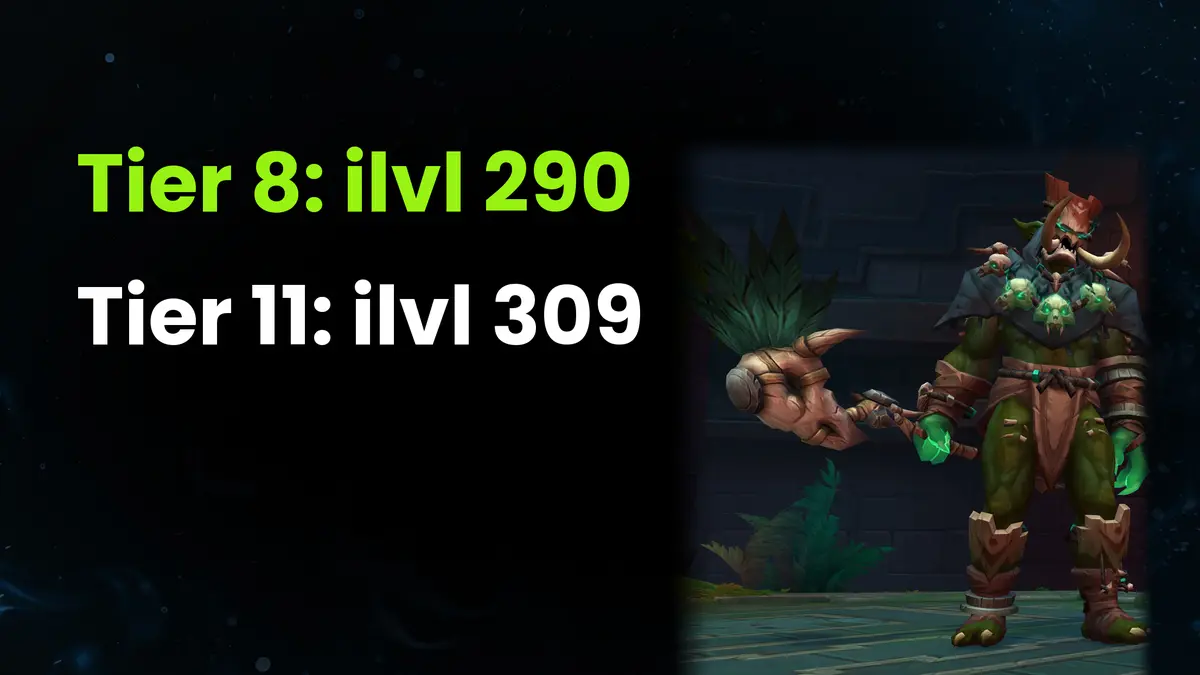
Like regular delves, the Labyrinth has 11 tiers, and the recommended ilvl is displayed in the entry window. This recommendation increases with each tier of the WoW Midnight Labyrinth, with the largest increase occurring between Tier 3 and Tier 4:
| Tier | Recommended ilvl |
|---|---|
| Tier 1 | 170 |
| Tier 2 | 187 |
| Tier 3 | 200 |
| Tier 4 | 259 |
| Tier 5 | 268 |
| Tier 6 | 275 |
| Tier 7 | 281 |
| Tier 8 | 290 |
| Tier 9 | 296 |
| Tier 10 | 303 |
| Tier 11 | 309 |
Three cleared chambers on the current Tier unlock the next Tier and grant an achievement like The Labyrinth of Kindo'jan: Tier 8, which also unlocks the tiers of regular delves. I recommend entering Tier 8 with an ilvl of 290 or higher, because below this tier there are neither Kindo'jan nor Wah'du quests for Myth gear. On those same tiers, Bountiful Coffers and Hidden Troves give Rank 5 Curios if you have Journey rank 1 unlocked. For solo achievements and clearing all nine chambers in a single run on the highest difficulty, you'll need Tier 11, where the entry window recommends an ilvl of 309.
Labyrinth Walkthrough by Chamber
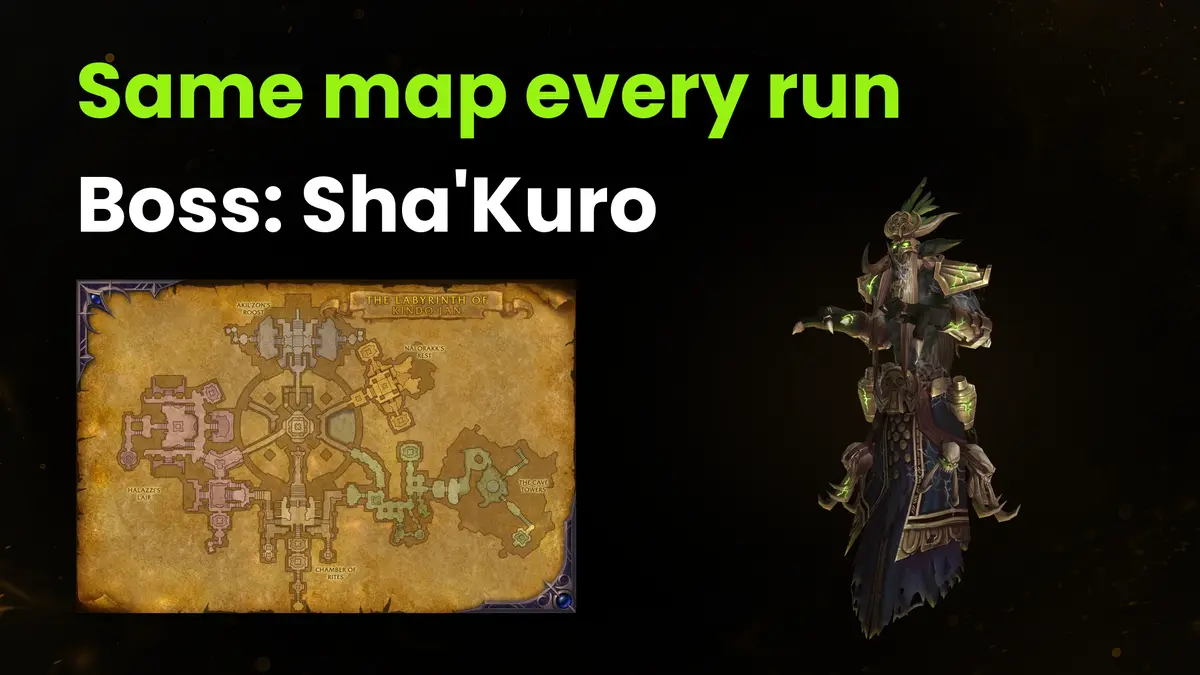
The objective of each of the nine Labyrinth chambers changes from run to run. Its location on the map, the number of Sturdy Chests without conditions, and the hidden secrets are the same:
| Chamber | Location on the Map | Unconditional Sturdy Chests | Secrets |
|---|---|---|---|
| Chamber of Rites | entrance, south | 2 | Akil'zon's seal, Hexmask or Locked Room location, Wah'du |
| The Reliquary | southwest | 2 | Nalorakk's seal |
| The Catacombs | southeast | 2 | Halazzi's seal |
| Halazzi's Lair | west | 2 | Jan'alai's and Halazzi's seals |
| The Cave Towers | East | 2 | Akil'zon Seal, Hexmask Slot, bonus objective with five Loa Statuettes |
| The Central Chamber | Center | 3 | Flooded Chamber behind the waterfalls |
| Akil'zon's Roost | north | 2 | Akil'zon's seal, Hexmask location, door to the Speaker's Chamber |
| Jan'alai's Refuge | northwest | 3 | Jan'alai's seal, Hexmask location |
| Nalorakk's Rest | northeast | 2 | Nalorakk's seal, Hexmask location |
In the introductory run of The Reliquary, you'll encounter the Spirit Thieves scenario (you fill the gauge and free nine souls from the Spirit Reliquary), after which Halazzi's Lair triggers the Reliquary Ritual with nine Corrupted Reliquaries and the boss Sha'Kuro. Later, in Jan'alai's Refuge, the Returning the Bounty scenario may drop, which ends with a fight against the Pit Boss. Marauders or spirits of the dead fill The Central Chamber, the dead rise in The Catacombs, and Nalorakk's Rest features objectives centered around necromancers. Among other scenarios, keep an eye out for Containment Breach, in which you once again light the Flame of Jan'alai braziers, as well as The Wandering, Fools and Curses, and Bear's Burden. You can plan your route for chests and secrets in advance because, unlike scenarios, they remain in the same locations on every run.
Best Route Through the Chambers
For the second chamber, you always choose between two options: The Reliquary or The Catacombs. The Reliquary leads to Halazzi's Lair, while The Catacombs leads to The Cave Towers. Both paths converge at The Central Chamber, which opens up the northern part of the Labyrinth. Since the game unlocks a new chamber after you complete the current task, you should plan the route for your first full run around the Wah'du quest objective and the Hexmask locations.
Subsequent runs are shorter, since after the door is opened for the first time, the fight with Kindo'jan no longer requires all nine chambers. You'll need a path to Akil'zon's Roost via the Chamber of Rites and either the left branch with Halazzi's Lair or the right branch with The Cave Towers. Starting at Journey rank 4 (Spirited Away), Kinduru will also teleport you to chambers you've already cleared. A full run yields more chests and Great Vault credit, but the shortcut saves time on repeated attempts at the fight.
Known Labyrinth Bugs
Blizzard acknowledged that the first week of 12.1.5 came out with bugs that prevented players from completing runs and fixed them with hotfixes:
- Final moments of the fight with Kindo'jan - the fight would not end when Kindo'jan had 1 health point remaining, until the hotfix on October 14.
- Scenario bosses - the second kill of such a boss in a single run wasn't counted until October 15.
- Pit Boss and falling under the map - the game sometimes failed to spawn the Pit Boss in Returning the Bounty and caused characters to fall under the map in The Speaker's Chamber until both issues were fixed by a hotfix on October 16.
- Respawn in Jan'alai's Refuge - characters with short models would fall through the floor upon respawning until Blizzard fixed this on October 23.
- Great Vault credit - some scenarios did not give it until the fix on October 27.
In my opinion, it's wiser to finish a broken run via Kinduru in a cleared chamber to take the chests for everything you've completed. A failed fight with Kindo'jan no longer prevents you from receiving chamber rewards, because the October 21 hotfix opened an exit from the Labyrinth via Kinduru in the De Empire's Rest hall and during the Kindo'jan scenario. The October 16 update made Kinduru hand out the Loa-Blessed Wayfarer reward and the Loa-Blessed Victory toy upon completing the Labyrinth if you haven't taken them from the Ancestral Bounty.
Labyrinth Journey Ranks

Labyrinth Journey works as a separate nine-rank track from Delver's Journey. A rank here requires 2,100 points, versus 4,200 for Delver's Journey. The biggest contributor to progress on this track is the weekly delve quest A Gnawing Void of Curiosity, which rewards 2,000 points. Fighting Kindo'jan grants an additional 500 points. Track rewards unlock secrets and buffs in the WoW Midnight Labyrinth for subsequent runs:
| Reward | Rank | What it unlocks |
|---|---|---|
| Ancient Curios | 1 | Rank 5 Curios in Bountiful Coffers and Hidden Troves at Tier 8 and above |
| Lock, Key, and Mask | 2 | Locked Room, Keeper of the Key, and Hexmasks |
| Akil'zon's Favor | 3 | rooms behind Akil'zon's seals |
| Spirited Away | 4 | flight with Kinduru to cleared chambers |
| Jan'alai's Favor | 5 | Jan'alai's Seals |
| Loa-Spiritual Conduits | 6 | Spiritual Conduits in the Labyrinth |
| Nalorakk's Favor | 7 | Nalorakk's Seals |
| Delve-O-Bot 7001 | 8 | Midnight Software Update Chip from Telemancer Astrandis |
| Halazzi's Favor | 9 | Halazzi's Seals and the title <name\> of the Labyrinth |
The track fills up over the course of a few full runs if you open chests and explore the Labyrinth. Sturdy Chests also grant points, though all 44 chests unlock at rank 9. I believe it's worth opening every available Sturdy Chest during your first few runs, as the points they provide bring you closer to rank 2 with Hexmasks and the Locked Room. For a solo fight against Kindo'jan, ranks 3, 7, and 9 are the most important, with their permanent seal buffs.
Labyrinth Treasure Room and Secrets
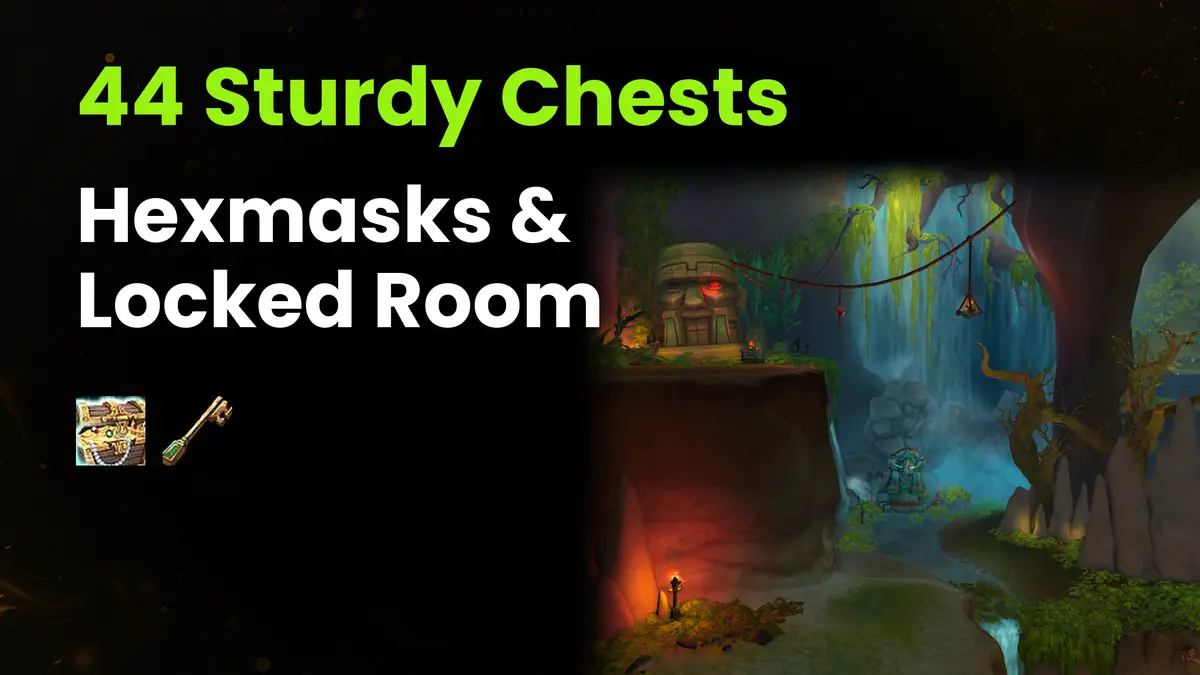
The Labyrinth Treasure Room is a room with chests at the end of a run, where the game adds a Bountiful Coffer, a Mislaid Treasure, and two Heavy Trunks for every three chambers you clear. Each Bountiful Coffer, which you open with a Restored Coffer Key, contains a Heroic Soul Fragment. The chests in this room drop gold, Warbound Champion gear, and Voidlight Marl. You'll also find Undercoin, Corrosive Coins, and Mistcrests there for upgrading your gear. I'd save Restored Coffer Keys for a full run, where the room receives three Bountiful Coffers.
The Labyrinth itself hides Sturdy Chests, the Flooded Chamber, and rooms behind loa seals. It also contains Hexmasks with a Locked Room and Spiritual Conduits, which buff the entire party. A random Mislaid Treasure gives currency, a small amount of Journey progress, and delve cosmetics. Together with a Mislaid Curiosity, it also gives boons (Boon of Possibilities), which stack until the end of the run. Each such find makes your character stronger by the time you reach the next chamber.
All 44 Sturdy Chests
Each of the 44 Sturdy Chests in the Labyrinth can be opened once. Chambers contain 20 chests with no conditions, with two or three in each. The game hides another five in the Flooded Chamber, and keeps the remaining 19 in nine rooms behind loa seals. I'd start with the chambers and the Flooded Chamber, since the sealed doors unlock as your Journey rank increases.
The chests contain decor and transmogs, reputation with the Midnight factions in full Renown levels, and progress toward the Delver's Journey and Labyrinth Journey. The currencies found inside include Voidlight Marl, Corrosive Coins, and Undercoin. All 44 chests give the Kindo'jan's Labyrinth Discoveries achievement and the Treasure Hound title. The map marks any unopened chests in accessible rooms. L00T RAID-R Mini does not detect them and instead displays the Mislaid Curiosities of the current chamber.
Flooded Chamber Ice Wall
Behind the ice wall in The Central Chamber lies the Flooded Chamber, a hidden room containing five Sturdy Chests. Inside, you'll find a Hero Mistcrest, a Myth Mistcrest, and a warbound Blessed Loa Armament—which you can reach in four steps:
- On the eastern side of The Central Chamber, find two waterfalls.
- Swim underwater between them, and you'll come out near a staircase.
- Climb the staircase to the ice wall.
- Melt the wall with any Fire damage (if your class doesn't have it, the Rune of Unleashed Fire from the Omnium Folio or the Fiery Hexmask from Journey Rank 2 will suit).
It's best to unlock the Flooded Chamber on your very first runs, since no other room in the Labyrinth contains five Sturdy Chests. The Blessed Loa Armament found there also grants a Hero 1/5 item in an armor slot, which you can choose yourself.
Hexmasks and the Archaic Amani Key
Starting at Labyrinth Journey rank 2, three Hexmasks and one Locked Room appear in every run. Three of the five slots for them are located in the Chamber of Rites, The Cave Towers, and Akil'zon's Roost. The other two wait in Jan'alai's Refuge and Nalorakk's Rest. The masks occupy three slots, the Locked Room takes the fourth, and the fifth remains empty. A mask you find follows you until the end of the run—including the fight against Kindo'jan—and gives one of three attacks:
- Frozen Hexmask—Frost Nova slows enemies around you.
- Fiery Hexmask—the Burning Gaze of Ula'tek spell deals increasing Fire damage and melts the ice wall in the Flooded Chamber.
- Thundering Hexmask—Chain Lightning strikes up to four targets.
Collecting all three Elemental Hexmasks unlocks the Happy Hexmask Collector achievement. The door to the Locked Room is opened by the Archaic Amani Key from the Keeper of the Key, who can spawn anywhere in the Labyrinth. Inside the room, you'll find several Mislaid Curiosities and Mislaid Treasures with boons. Unlocking the doors gives two more achievements: Lock and Key for the first one and Lock and Key Master with the Lockpickin' title for 20. Since the Locked Room appears once per run, it will take at least 20 attempts to unlock the second one.
Loa Seals and Spiritual Conduits
Four ranks of Labyrinth Journey unlock doors with Loa seals, behind which lie two or three Sturdy Chests and Mislaid Curiosities that respawn on every run. Each Loa also gives up to three different types of buffs:
| Loa | Rank | Permanent Buff | Glove Enchant | Spiritual Conduit |
|---|---|---|---|---|
| Akil'zon | 3 | Akil'zon's Swiftness, +3% movement speed per cleared chamber | Ancient Hash'ey Battle Art: Falco Strikes, Nature damage with a 20% chance to re-trigger | Spiritual Wind Conduit, +25% combat speed |
| Jan'alai | 5 | none | Ancient Hash'ey Battle Art: Heat Wave, AoE Fire for 20 seconds | Spiritual Fire Conduit, AoE Fire every 2.5 seconds |
| Nalorakk | 7 | Nalorakk's Ferocity, +3% main stats per cleared chamber | Ancient Hash'ey Battle Art: Ursine's Ironhide, shield for 15 seconds | Spiritual Earth Conduit, 50% damage reduction |
| Halazzi | 9 | Halazzi's Shroud, saves you from death once per run and restores health to maximum | Ancient Hash'ey Battle Art: Eye of the Lynx, grants Haste and Leech to you and a random ally, including Valeera | Spiritual Mist Conduit, finishes off non-bosses below 20% health |
Glove enchants work in delves and the Labyrinth, although outside these areas, these effects were disabled by the October 14 hotfix. Starting at Rank 6, four Spiritual Conduits appear in each run—one per loa. Since the Conduit buff lasts 2 minutes for the entire group, I recommend activating it right where you find it.
Labyrinth of Kindo'jan Rewards

The reward per run increases with each chamber cleared, reaching six Heavy Trunks and three Bountiful Coffers after the ninth chamber. The number of chests and Great Vault credits depends on which chamber you finished the run at:
| Chambers Cleared | Heavy Trunk | Bountiful Coffer | Great Vault Credit |
|---|---|---|---|
| One chamber | 1 | 0 | 0 |
| Two chambers | 2 | 0 | 0 |
| Three chambers | 2 | 1 | 1 |
| Four chambers | 3 | 1 | 1 |
| Five chambers | 4 | 1 | 1 |
| Six chambers | 4 | 2 | 2 |
| Seven chambers | 5 | 2 | 2 |
| Eight chambers | 6 | 2 | 2 |
| Nine chambers | 6 | 3 | 3 |
| Kindo'jan | Ancestral Bounty | 0 | +1 (4 total) |
Every three chambers count as one delve in the World row of the Great Vault at the Tier you have chosen, so a full run together with Kindo'jan counts as four delves there. In the WoW Labyrinth of Kindo'Jan Boost, our team clears the entire Labyrinth and Kindo'jan on your character so you can take all four Great Vault credits along with the Heavy Trunks and Bountiful Coffers. Kindo'jan himself drops the Ancestral Bounty, containing 10 Hero Mistcrests, 10 Myth Mistcrests, and a Heroic Soul Fragment. The same chest also contains a random top-tier Curio that you don't already have, two Corrosive Souls, and a toy Loa-Blessed Victory. An additional 500 Labyrinth Journey points and 300 Delver's Journey points from the Ancestral Bounty advance both tracks.
Hero and Myth Gear
The Labyrinth gives gear for two tracks: the Hero track for Heroic Soul Fragments and Blessed Loa Armament, and the Myth track for Wah'du quests. You exchange three Heroic Soul Fragments for a random Hero 2/6 item (ilvl 308) with no slot selection. Fragments come from every Bountiful Coffer and from the Ancestral Bounty after Kindo'jan. Two Blessed Loa Armaments are found in Sturdy Chests (one of them in the Flooded Chamber) and give a Hero 1/5 item in an armor slot of your choice, though weapons and trinkets cannot be obtained this way. In my opinion, it's best to give the Blessed Loa Armament to your weakest armor slot, since the random item given in exchange for fragments doesn't offer that kind of choice.
The Myth track is unlocked by Wah'du, who stands at the entrance to the Chamber of Rites and gives a quest once a week for a specific chamber at Tier 8 and above. The quest rewards 2,000 Undercoin and one Mythical Soul Fragment. Wah'du exchanges three fragments for a Myth 2/6 item (ilvl 321) in the chosen slot. During Patch 12.1.5, six quests give two such items, even if you missed a week, thanks to the catch-up feature.
Cosmetic and Toy Rewards
Most Labyrinth cosmetics are found in Sturdy Chests and in rooms behind loa seals. Each Labyrinth transmog, decor, and toy is tied to its own room, quest, or fight:
| Reward | Type | Where to Find |
|---|---|---|
| Loa-Touched Spine | transmog, back | Akil'zon's room in the Chamber of Rites, Rank 3 Journey |
| Hexdrinker's Shoulders | transmog, shoulders | same location |
| Loa-Touched Deltoid | transmog, shoulders | Jan'alai's room in Jan'alai's Refuge, Rank 5 |
| Loa-Touched Visage | transmog, head | Halazzi's room in Halazzi's Lair, Rank 9 |
| Amani Effigy, Hexbearer's Pauldrons, and Effigy of Corrosion | transmog | one of 44 Sturdy Chests |
| Ancient Amani Mural and Brown Amani Tapestry | decor | Sturdy Chests |
| Ruined Amani Ritual Urn | decoration | bonus objective in The Cave Towers, five Loa Statuettes |
| Kinduru's Spiriting Quill | toy | final quest in the introductory chain |
| Feathers of Akil'zon | toy | Akil'zon's room in Akil'zon's Roost, rank 3 |
| Rite of Jan'alai's Flame | toy | Jan'alai's room in Halazzi's Lair, rank 5 |
| Nalorakk's Strength Charm | toy | Nalorakk's room in The Reliquary, rank 7 |
| Trail of Halazzi | toy | Halazzi's room in The Catacombs, rank 9 |
| Loa-Blessed Victory | toy | Ancestral Bounty after Kindo'jan at Tier 8 and above |
The Cave Towers can be completed without the bonus objective involving five Loa Statuettes, but I wouldn't skip it because of the Ruined Amani Ritual Urn, which the game awards for this objective. You can place Labyrinth decor in your home via the housing system in WoW Midnight.
Labyrinth Titles and Achievements
The Labyrinth doesn't have a meta-achievement, but its achievements give a mount and six titles. Their requirements vary, ranging from a single entry into the Labyrinth to a solo run without losing a life:
| Achievement | Requirement | Reward |
|---|---|---|
| Knock Knock | Enter the Labyrinth | None |
| The Labyrinth of Kindo'jan | Clear nine chambers in a single run | None |
| Whose Labyrinth? | Same as above on Tier 11 | Maze Runner title |
| My Labyrinth | Clear 100 chambers total | None |
| The First Hash'ey | Kill Kindo'jan (Tier 8 and above) | Loa-Blessed title |
| Let Me Solo Him: Kindo'jan | Solo Kindo'jan at Tier 11 in Midnight Season 2 | Loa-Blessed Wayfarer (mount) |
| Fabled Let Me Solo Him: Kindo'jan | Same as above during the first two weeks of the patch | Fabled Vanquisher of The First Hash'ey title |
| The Labyrinth of Kindo'jan: One-Champion Army | Nine chambers and Kindo'jan solo on Tier 11 without losing a life in Season 2 | Lone Raider title |
| Kindo'jan's Labyrinth Discoveries | All 44 Sturdy Chests | Treasure Hound title |
| Lock and Key Master | 20 Locked Rooms opened | Lockpickin' title |
| Treasures Upon Treasures and A Few More Can't Hurt | 10 and 50 Mislaid Treasures | None |
Another title (\<name\> of the Labyrinth) comes with Journey rank 9. The same rank is required for Kindo'jan's Labyrinth Discoveries, since not all 44 chests are unlocked until then. Both Midnight Season 2 solo achievements are available until the end of the season.
Kindo'jan Fight Guide
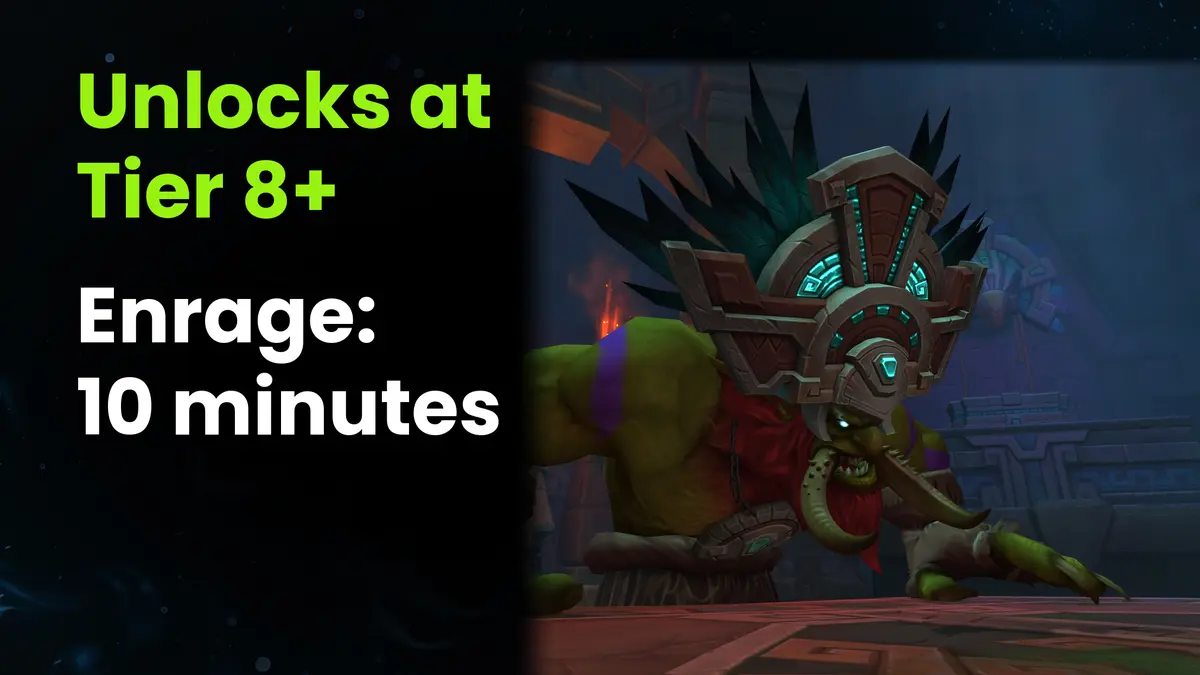
The Kindo'jan fight unlocks when you clear all nine chambers at Tier 8 or higher for the first time in a single run. The door to the Speaker's Chamber at the top of Akil'zon's Roost will no longer close after that. Behind it are a waystone and the Altar of Corrosion, where you'll change your glove enchant, Curios, and Corrosive Powers before the fight. First, you'll face Den'Zara of Vilebranch, who seeks to subjugate the spirit of Kindo'jan (the first Hash'ey of the Amani). Kindo'jan himself appears after her death.
After 10 minutes of fighting, Kindo'jan enrages. More dangerous than this timer is Disgraceful Display, which applies a stack with every hit from an avoidable mechanic. Three such stacks within 5 minutes will kill any character, even a tank. I'd recommend learning the mechanics at Tier 8, since they're the same at Tiers 9-11, although Kindo'jan has more health and deals more damage there.
Phase One Abilities
For the first 90 seconds, Kindo'jan stands at the northern edge of the platform and uses his abilities in a set order. His rotation in this phase consists of four abilities:
- Eruption of Mojo - Kindo'jan places circles on the floor, the largest of which roots a character for 5 seconds. Each cast leaves a pool of Erratic Mojo beneath you until the end of the fight; you should drop it at the edge of the platform so it doesn't block your path.
- Hash'ey's Command - four Amani Headhunters come out at his call; their Axe Barrage places additional circles on the floor. Since a hit from Axe Barrage does not apply a Disgraceful Display stack, you do not need to kill all the hunters.
- Whirling Axes - four circles of axes travel in an arc and return to Kindo'jan. Dodge both passes, as each hit on you applies a stack of Disgraceful Display.
- Crushing Blow - along with an area attack near Kindo'jan, an Amani Juggernaut appears in the center of the platform; he cannot be stunned or crowd-controlled. His Phalanx Charge knocks you back less than halfway across the platform. Interrupt Amani Aegis, or damage dealt to the Juggernaut and nearby allies will be reduced by 33%.
If your class lacks an interrupt for Amani Aegis, Valeera (as a DPS) will take over this job.
Intermission and Phase Two
After 90 seconds, Kindo'jan leaves, yielding the platform to four loa speakers. Damage to Kindo'jan does not go through while they take turns conducting their trials:
- De Rising Storm - Ahn'joli's trial summons Akil'zon's avatar to the center, which pushes characters toward the edge. Stand in the narrow safe zones between the gusts.
- Gambit in de Shadows - Halazzi arrives at Zen'toka's call along with four Shadows of Halazzi, who stun Valeera. Block the path of the true shadow (it leads to the targeting circle) with your body, or Valeera will be incapacitated.
- Ursine Rampage - after Bindu summons Nalorakk, waves of bears rush across the platform. Look for a gap between the waves before they charge, or the impact will knock you off the platform.
- Cleansing Flame - along with Jan'alai (summoned by Rotahn), two sigils appear on the floor. Toward the end of the cast, soak the sigil that Valeera isn't pinging, because missing it will kill you.
In the second phase, Kindo'jan returns and mixes his abilities with the loa trials in random order. Kindo'jan's movement to the corner of the platform hints at which trial will come next. The most dangerous combination is Crushing Blow with Cleansing Flame, because the Amani Juggernaut casts Phalanx Charge at the start of the trial. Position yourself so that the knockback carries you toward your own sigil. Save Bloodlust or Heroism for the second phase.
Best Valeera Setup
You can choose Valeera's role in the fight with Kindo'jan to suit your playstyle, since it has no lethal interrupts or dispels. Talents and the companion's role (DPS, Healer, or Tank) can be changed at the start of the run and when entering a new chamber. A Healer keeps your health up, but a DPS interrupts Amani Aegis. I wouldn't choose the Tank role, because when Valeera's health drops to zero in this role, she becomes Unconscious and receives 50% less healing. The rest of the build consists of four parts:
- Combat Curio - the Viperwind Idol from the Labyrinth suits any of Valeera's roles and has a chance to transform you into a poisonous tornado for 15 seconds, dealing Nature damage and reducing the damage you take. The Corrosive Bilespear is also suitable for fighting Kindo'jan.
- Utility Curio - choose between Dundun's Favor (which also works for all roles) and Soul-Cracking Dreamcatcher. The new Dusty Loa Totem grants Might of the Loa or Grace of the Loa for 30 seconds at the start of the fight and once every 60 seconds.
- Bursting Toad Toxin - this poison is chosen for its damage.
- Corrosive Powers - the powers from the Vaults of Atal'utek also work in this fight. Equip Ula'tek's Gift, and if the second power is unlocked, equip Insidious Venom as well.
Any seasonal Curio (including the new Viperwind Idol and Dusty Loa Totem) can be upgraded to Rank 5. Ready-made Curios of this rank drop in the Labyrinth at Tier 8 and above, provided you have unlocked Journey rank 1.
Solo Tier 11 Preparation
For a solo run on Tier 11 for Let Me Solo Him: Kindo'jan, the entry window recommends ilvl 309. During the first week, many players reported kills in under 90 seconds, before the intermission, because the run's boons gave the character a lot of power. Since boons are crucial for this fight, I recommend clearing all nine chambers even after the door is open if you're aiming for a solo kill, and preparing your character in six steps:
- Obtain the permanent seal enhancements (Akil'zon's Swiftness, Nalorakk's Ferocity, and Halazzi's Shroud), which Journey ranks 3, 7, and 9 give.
- Open every Mislaid Curiosity and Mislaid Treasure along the way, as their boons stack until the end of the run.
- Collect the three Hexmasks at their spawn locations, and spend the Archaic Amani Key obtained from the Keeper of the Key on the Locked Room.
- Use Spiritual Conduits on your way to Akil'zon's Roost, because the October 20 hotfix disabled their effects during the fight with Kindo'jan.
- At the waystone and the Altar of Corrosion behind the door to the Speaker's Chamber, apply the necessary glove enchantment and set up your Curios and Corrosive Powers.
- Do not use Kinduru's Spiriting Quill until the end of the fight; otherwise, this toy will end the run.
Another reason not to cut corners on the path to Kindo'jan is Akil'zon's Swiftness and Nalorakk's Ferocity, which each give an additional 3% for every chamber cleared. Halazzi's Shroud allows for one mistake in this fight, since this buff saves you from death once per run and restores your health to maximum.
How to Get Loa-Blessed Wayfarer
The game awards the flying Loa-Blessed Wayfarer mount for a solo kill of Kindo'jan on Tier 11 in Midnight Season 2. The Let Me Solo Him: Kindo'jan achievement counts this fight as a solo kill if there are no other players in the group, though you can bring Valeera. The path to the mount consists of five steps:
- Reach Tier 11 by clearing three chambers on each Tier.
- Raise your ilvl to 309, which is the entry requirement recommended for Tier 11.
- Open the door to the Speaker's Chamber by clearing nine chambers on Tier 8 or higher in a single run, if it's still locked.
- A solo run on Tier 11 leads to Akil'zon's Roost, where you defeat Den'Zara and Kindo'jan.
- Take the mount from the Ancestral Bounty or, if you missed it, obtain it from Kinduru after completing the Labyrinth.
During the first week of 12.1.5, more than 150,000 players in NA and EU killed Kindo'jan on Tier 11. Over 70,000 of these kills were in NA and over 82,000 in EU. The WoW Labyrinth of Kindo'Jan Boost service includes a solo run on Tier 11, which our team will complete on your character. This run earns you the Loa-Blessed Wayfarer reward. A 24/7 chat operator will recommend a plan for your account, since the Self-play mode is not available for services like Let Me Solo Him.
Labyrinth of Kindo'jan Carry
The Labyrinth of Kindo'jan carry is for those who lack the time for a full run or the experience to solo Tier 11. In the WoW Labyrinth of Kindo'Jan Boost service, our team clears all nine chambers on Tier 1-11 and defeats Kindo'jan. This service from the WoW boost catalog combines the main objectives of the WoW Midnight Labyrinth into a single order:
- Nine chambers and Kindo'jan—we clear the entire Labyrinth in a single run and defeat the boss, earning you The First Hash'ey achievement.
- Let Me Solo Him: Kindo'jan—this achievement is earned through a solo run on Tier 11, completed by our booster. Along with it, you'll receive the Loa-Blessed Wayfarer reward.
- The Labyrinth of Kindo'jan: One-Champion Army—this achievement, which grants the Lone Raider title, is earned by completing a solo run on Tier 11 without dying.
- Two Myth armor pieces—these are obtained from the weekly Wah'du quest chain, which our team also completes.
- Chests and the Great Vault—for every three chambers, you get Heavy Trunks, Bountiful Coffers, and a Great Vault credit.
You choose options and extras on the service page together with a 24/7 live chat operator, who helps you choose them based on your goals. Payment is processed through a secure payment service with a confirmation email, after which our team creates a plan and begins the run at the agreed-upon time (with the Express option, your order receives priority). Gold, gear, and items from the run remain on your character. For weekly Bountiful runs in regular delves, the Delves service suits the situation, with options ranging from Delve level 4 to Delve level 11. The Apophic Soul Crusher mount for soloing Azta'rec is included in the Let Me Solo Him: Azta'rec Boost service.

WoW Midnight Labyrinth FAQ
 WoW Midnight Labyrinth FAQ
Can you do the Labyrinth in a group?
The Labyrinth can be cleared in a group of up to five players. Valeera joins solo players and groups of up to four people, but she does not join a full group of five. The Spiritual Conduits buff affects all group members. The October 16 hotfix removed the inflated health and damage of mobs and bosses when playing with other players.
Can Labyrinth progression be saved?
Progress through the chambers is lost if you leave the delve, because there are no save points in the Labyrinth. A brief exit from the game does not reset your run. Journey points and permanent seal buffs stay with you in any case. To avoid losing chests from cleared chambers, finish your run with Kinduru.
How long does a full Labyrinth run take?
A full run through all nine chambers takes at least 45-60 minutes. The fight against Kindo'jan follows and lasts until the enrage at 10 minutes. I'd recommend setting aside an hour with some extra time, since leaving the delve in the middle of a run resets all progress.
Does Valeera have a max level?
Valeera's level cap in Midnight Season 2 is 80 versus 60 in Season 1. Her power also increases as your item level rises.
Is Fabled Let Me Solo Him still available?
Fabled Let Me Solo Him is no longer available, as the window closed with the weekly reset on October 27. The achievement was available from October 13 to 27 because Blizzard acknowledged bugs from the first week and extended the timeframe by one week. The regular version of the achievement and the reward for the solo achievement will remain in the game until the end of Season 2.
When does Midnight Season 2 end?
Blizzard has not announced the end date for Midnight Season 2. Patch 12.2 Eclipse is expected in early 2027, but no exact date has been set. It's best to complete the season's solo achievements ahead of time, as they will no longer be available after Season 2 ends.
Is the Labyrinth worth running on alts?
Alts benefit from the Labyrinth by earning four Great Vault credits for a full run. After the introductory quest chain, it's unlocked for the entire Warband without having to repeat the quests on each alt. Heroic Soul Fragments from Bountiful Coffers suit getting a new character started with gear.
Can you run the Labyrinth while leveling?
You can start even while leveling, because the introductory quest chain is designed for levels 80–90. The October 21 hotfix unlocked the A Golden Opportunity scenario lever for players level 80 and above. Lower tiers also suit characters while leveling, since the entry window for Tiers 1-3 recommends an ilvl of 170-200.